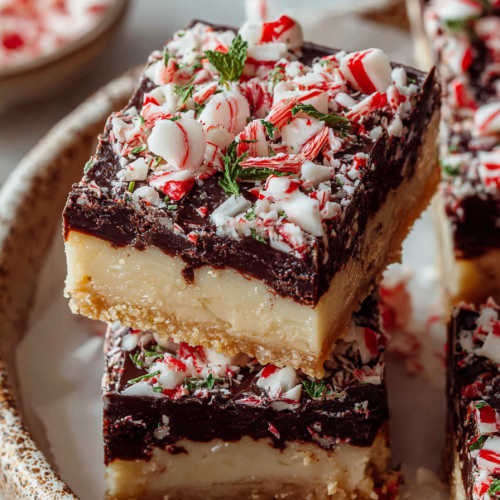
Delish Peppermint Bark Cookie Bars
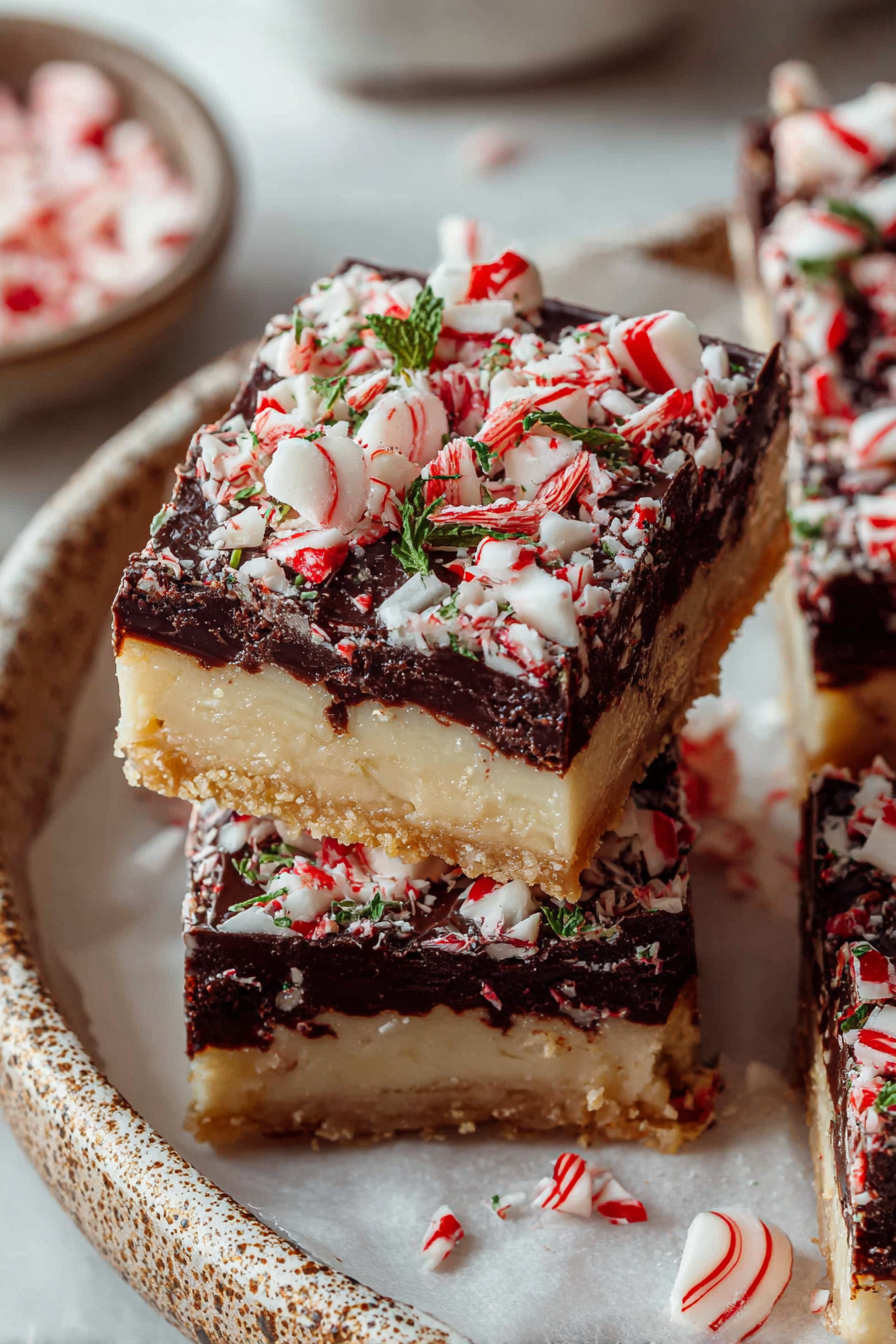
I made these peppermint bark cookie bars because I wanted something festive that didn’t require me to stand in the kitchen tempering chocolate like a chocolatier with a diploma and patience. Think: buttery cookie base, creamy white-and-dark chocolate swirls, and crunchy candy cane confetti that doubles as edible glitter. They’re rich enough to make you feel fancy and easy enough that you can make them while your toddler narrates Paw Patrol plot holes. Plus, they slice cleanly, stack beautifully, and survive car rides to school parties without crumbling into sadness. Holiday hero status, unlocked.
Last year, my husband decided to “help” by crushing candy canes. He wrapped them in a towel and beat them with the rolling pin like a cartoon burglar, launching peppermint shrapnel into every corner of my kitchen. The dog smelled like a candy shop for three days. Meanwhile, I lined the pan with foil, forgot parchment, and discovered that foil is basically clingy aluminum cling film when it meets warm chocolate. I had to chisel bars out like Indiana Jones retrieving artifacts. We still ate them—because chocolate. This year, I used parchment and a bigger pan. Did I still melt the chocolate in a measuring cup that was very obviously too small? Yes. Did I learn anything? Also yes, but not enough to make fewer dishes.
Why You’ll Love This Delish Peppermint Bark Cookie Bars
– The base is a soft sugar cookie that pretends to be classy while absolutely smashing it with a double-chocolate top. Multitasking queen.
– You get peppermint bark without the patchy, uneven shards that look like I made them with oven mitts on.
– Festive crunch, no candy thermometer, and they look like you tried hard (you did not).
– Make-ahead friendly: they chill while you ignore your inbox.
– Slice into neat bars for gifting, or into chaotic triangles if your knife skills match my patience levels.
– They’re sturdy enough to survive a potluck but delicious enough to never make it there.
Time-Saving Hacks
– Use refrigerated sugar cookie dough. Will it taste like a holiday miracle? Shockingly close.
– Buy the pre-crushed candy cane bits. The bag costs more but saves you from peppermint hail.
– Melt chocolate in the microwave at 50% power. Stir like you mean it, and pretend it’s “tempered.”
– Line the pan with parchment and let it overhang. Instant sling. Fewer prayers.
– One-bowl chaos: mix dough, wipe out the bowl with a paper towel, then melt chocolate in it. Yes, it’s unhinged. Yes, I do it.
– Chill it outside on the porch if you live somewhere cold. Nature’s walk-in freezer.
– Warm your knife under hot water and wipe between cuts for bakery-level edges you can ’gram and forget to post.
MORE OF OUR FAVORITE…
Serving Ideas
– With coffee, because peppermint + caffeine = “I can wrap gifts in under four hours.”
– Crumble over vanilla ice cream for a dessert that screams “I planned this” while you definitely did not.
– Serve with hot cocoa for the kids and wine for you if the kids drove you nuts. Balance.
– Plate them on your fanciest platter to distract from the one corner you taste-tested aggressively.
– Keep it simple: napkin, couch, Hallmark movie you won’t admit you watched.
What to Serve It With
– A salty snack board (pretzels, nuts, cheese) to cut the sweetness and justify a second bar.
– Espresso or a peppermint mocha if you want to theme your entire personality.
– A platter of other cookies: ginger snaps, shortbread, and that one store-bought tin we all pretend is “vintage.”
– Fresh berries if you want to trick your brain into thinking this is balanced.
Tips & Mistakes
– Don’t overbake the cookie base. Pull it when it’s barely golden at the edges; it’ll keep cooking in the pan.
– Use real white chocolate, not “white baking chips” that refuse to melt. Check that cocoa butter is in the ingredients.
– Peppermint extract is potent. Start with a little—you want candy-cane joy, not toothpaste tragedy.
– If your chocolate seizes, add a tiny splash of neutral oil or warm cream and whisk like your holiday spirit depends on it.
– Crush candy canes to mixed sizes: dusty bits melt into the chocolate; bigger shards give crunch.
– Let layers set fully before slicing or you’ll have marble smear art (which is cute, but sticky).
– Warm the knife, wipe between cuts, pretend you’re on a baking show, ignore the chaos behind you.
– If the top layer blooms (gets whitish streaks), it’s still perfect for eating. Call it “snowy aesthetic.”
Storage Tips
Store it in the fridge… if there’s any left. Cold midnight leftovers? Sometimes better than fresh.
– Airtight container, layered with parchment. Fridge up to 1 week.
– Freeze up to 2 months; thaw in the fridge so the chocolate doesn’t sweat like me in a parka indoors.
– Room temp for a party: 3 to 4 hours in a cool house. If it’s toasty, keep them chilled and do dramatic reveals.
Variations and Substitutions
Swap whatever you want—sugar ↔ honey, soy sauce ↔ tamari, or skip steps and call it “deconstructed.” It still counts.
– Brownie base instead of cookie: outrageous and fully legal.
– Oreo crumb crust with butter: no mixing, just vibes.
– Use semisweet + white chocolate swirl, or go all dark with a drizzle of white for zebra energy.
– Add crushed pretzels on top for sweet-salty crunch.
– Dairy-free? Use dairy-free chocolate and plant-based butter; still delish.
– Gluten-free sugar cookie mix works great—no one notices under the chocolate.
– Swap candy canes for chopped Andes mints or toffee bits if peppermint isn’t your personality.
– Add a whisper of espresso powder to the chocolate to deepen the flavor and your resolve to eat more.
Delish Peppermint Bark Cookie Bars
Ingredients
Main Ingredients
- 0.75 cup unsalted butter softened
- 0.5 cup granulated sugar
- 0.5 cup light brown sugar packed
- 2 large eggs
- 2 tsp pure vanilla extract
- 0.5 tsp peppermint extract
- 2 cup all-purpose flour
- 1 tsp baking powder
- 0.5 tsp fine salt
- 1.5 cup semi-sweet chocolate chips
- 1 cup white chocolate chips or melting wafers use baking wafers for best melt
- 1 tsp coconut oil or neutral oil optional, divide between chocolates
- 0.75 cup crushed candy canes plus extra for garnish if desired
Instructions
Preparation Steps
- Preheat oven to 350°F. Line a 9x13-inch pan with parchment, leaving overhang for easy lifting, and lightly grease.
- In a large bowl, cream butter, granulated sugar, and brown sugar until light and fluffy. Beat in eggs, vanilla, and peppermint extract.
- Whisk flour, baking powder, and salt in a separate bowl. Add dry ingredients to the wet mixture and mix just until combined.
- Press dough evenly into the prepared pan. Bake 18 to 22 minutes, until edges are lightly golden and the center is just set. Do not overbake.
- Cool the cookie base for 10 minutes. Meanwhile, melt semi-sweet chips with 0.5 tsp oil in a microwave-safe bowl in 20 to 30 second bursts, stirring until smooth.
- Spread the melted semi-sweet chocolate over the warm cookie base.
- Melt white chocolate chips with the remaining 0.5 tsp oil in short bursts, stirring until smooth. Drizzle over the dark chocolate and gently swirl with a knife.
- Immediately sprinkle crushed candy canes over the top and lightly press so they adhere.
- Chill 20 to 30 minutes until set. Lift out using parchment, slice into 16 bars, and serve.
Notes
Featured Comments
“Impressed! Clear steps and so flavorful results. Perfect for busy nights.”
“New favorite here — absolutely loved. creamy was spot on.”
“This rich recipe was will make again — the creamy really stands out. Thanks!”
“This sweet treat recipe was so flavorful — the creamy really stands out. Thanks!”
“Impressed! Clear steps and absolutely loved results. Perfect for busy nights.”
“Super easy and absolutely loved! My family asked for seconds. Saving this one.”
“This crowd-pleaser recipe was family favorite — the rich really stands out. Thanks!”
“Impressed! Clear steps and turned out amazing results. Perfect for busy nights.”
“Made this last night and it was turned out amazing. Loved how the rich came together.”
“Made this last night and it was absolutely loved. Loved how the rich came together.”