Delish Gluten Free Fried Chicken Recipes
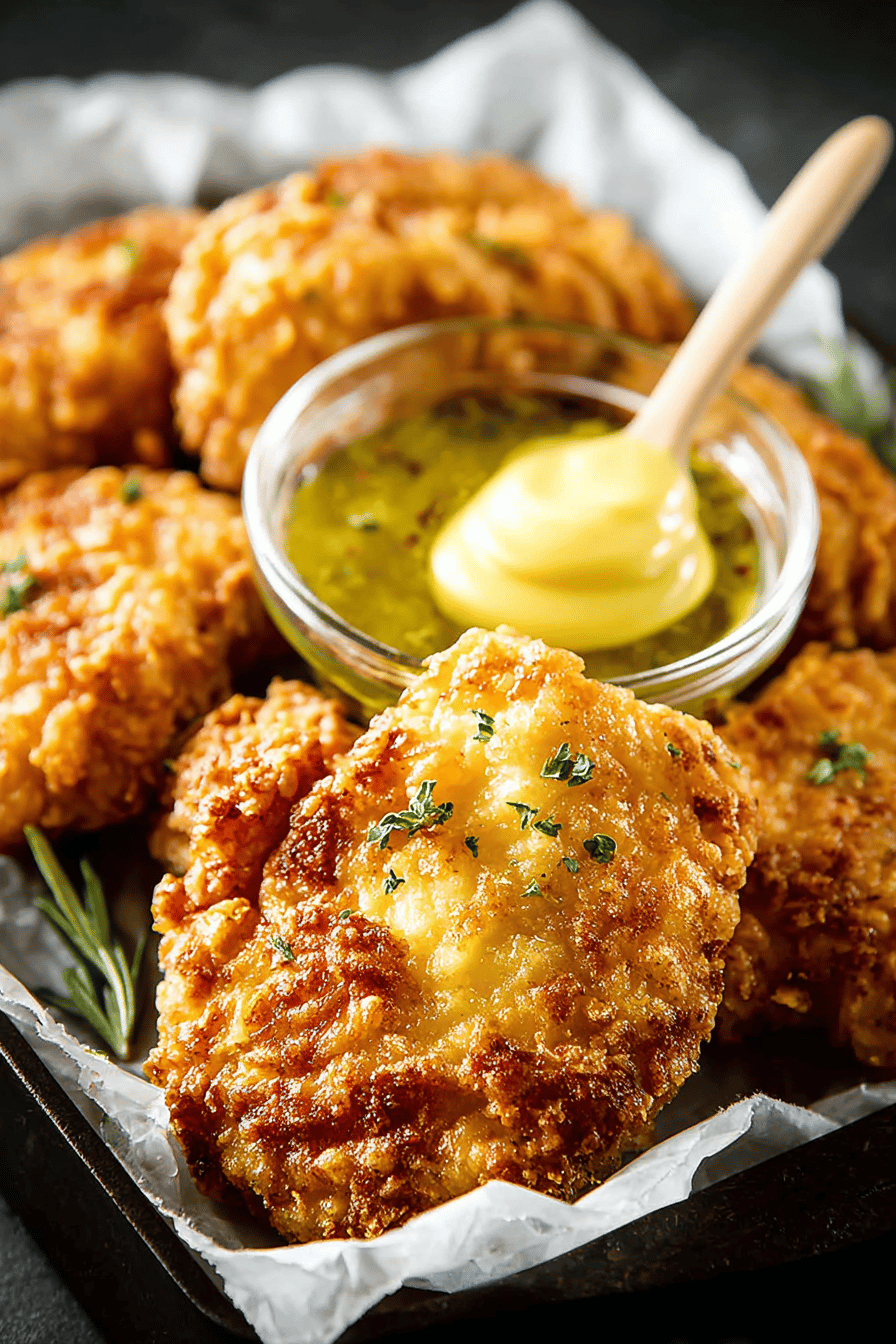
This is the kind of fried chicken that makes you do a little kitchen two-step while you wait on the last batch. It’s wildly crunchy, gluten free, and honestly tastes like the classic stuff we grew up on—thanks to a smart mix of rice flour and starch that fries up shatteringly crisp. The chicken stays juicy from a simple buttermilk soak (or a dairy-free dupe if that’s your thing), and the crust holds even if you sneak a piece cold from the fridge later. It’s weeknight doable if you use tenders, and special-occasion worthy if you go full bone-in.
My husband swears this is “the one,” and I can’t argue. The first time I nailed it, he stood at the counter with a towel over his shoulder like some diner cook, just nodding and crunching and not sharing. Now it’s a thing—Sunday chicken, pickles on the side, the kid asking for “crunchy pieces” and stealing the drumsticks like a tiny raccoon. I always save a batch for Monday lunches, but somehow there are only two lonely wings left by morning. Suspicious.
Why You’ll Love This Delish Gluten Free Fried Chicken Recipes
– It’s actually crispy-CRISPY. Like, audible. The rice flour + starch combo is magic.
– No weird GF aftertaste. Just seasoned, salty, perfect chicken.
– Works with thighs, tenders, wings—pick your fighter. Same method, easy timing tweaks.
– Stays crunchy for hours. Party-friendly. Sneak-a-cold-piece-friendly.
– No obscure flours. Pantry stuff. And you don’t need a deep fryer—just a Dutch oven.
How to Make It
Okay, game plan. Grab about 2 pounds of chicken (thighs and drumsticks if you want classic; tenders if you’re in a rush). In a big bowl, whisk 1 1/2 cups buttermilk with 2 teaspoons hot sauce, 1 teaspoon kosher salt, 1 teaspoon garlic powder, and a crack of pepper. Toss in the chicken and let it sit at least 30 minutes (overnight if you remember—I rarely do, and it’s still great). Dairy-free? Use 1 1/2 cups unsweetened plant milk + 1 tablespoon lemon juice or pickle juice. Boom—fake buttermilk.
MORE OF OUR FAVORITE…
Now the crispy coat: In a shallow dish, mix 1 cup white rice flour, 1/2 cup potato starch, 1/2 cup cornstarch, 2 teaspoons kosher salt, 1 teaspoon paprika, 1 teaspoon garlic powder, 1 teaspoon onion powder, 1/2 teaspoon black pepper, 1/4–1/2 teaspoon cayenne, and 1 teaspoon baking powder. That blend is the crunch party. Keep it dry—no sneaky lumps.
Heat 2–3 inches of neutral oil (peanut, canola, or avocado) to 330–350°F in a heavy pot. I love a shallow Dutch oven. While it warms, set up a rack over a sheet pan for the post-fry drip. Pull the chicken from the buttermilk, let the excess drip, then toss it in the dry mix. Press it in so the nooks get flour. For extra crunch, dip back into a quick egg wash (2 eggs + a splash of the marinade), then re-dredge. Rest coated chicken on the rack 10 minutes so the flour hydrates—this is the secret to that craggy crust.
Fry in batches—don’t crowd it or the oil sulks. Tenders take about 6–8 minutes; bone-in thighs/drums take 12–15 minutes, turning here and there. Keep the oil between 320–350°F and aim for 165°F inside. If it’s browning too fast, move the pan off the heat for a sec or finish the pieces in a 375°F oven for 8–10 minutes. Sprinkle with a pinch of salt the second it comes out. This batch feeds 4 very happy people.
Ingredient Notes
– Chicken: Thighs and drums are juicy and forgiving. Breasts work too—slice into tenders so they cook fast and don’t dry out.
– Buttermilk: Tenderizes and seasons. No buttermilk? Plant milk + lemon juice or pickle juice totally works in a pinch.
– Rice flour: The backbone of that light, crunchy shell. Don’t swap 1:1 with almond flour—it’ll burn and go mealy.
– Potato starch + cornstarch: The crispy tag team. If you only have one, use 1 cup rice flour + 1 cup cornstarch total.
– Baking powder: Tiny lift = extra crag. Don’t go wild or you’ll taste it.
– Spices: Paprika, garlic, onion, cayenne—classic fried chicken vibes. Adjust heat like a grown-up.
– Oil: High-heat neutral. Peanut, canola, or avocado. Reuse it if you strain it—just keep it gluten-free by not mixing with other breaded stuff.
– Eggs (optional): For a double-dip situation. Helps shaggy bits cling for extra crunch.
– Hot sauce: In the marinade for whisper-heat. Totally optional, highly recommended.
– Kosher salt: Season the marinade, the dredge, and the finish. All three. Don’t be shy.
Recipe Steps
1. Marinate chicken in 1 1/2 cups buttermilk, 2 tsp hot sauce, 1 tsp salt, 1 tsp garlic powder for 30 minutes to overnight.
2. Mix dredge: 1 cup rice flour, 1/2 cup potato starch, 1/2 cup cornstarch, 2 tsp salt, 1 tsp paprika, 1 tsp garlic powder, 1 tsp onion powder, 1/2 tsp pepper, 1/4–1/2 tsp cayenne, 1 tsp baking powder.
3. Heat 2–3 inches oil to 330–350°F in a heavy pot; set a wire rack over a sheet pan.
4. Dredge chicken, optional dip in 2 beaten eggs, then re-dredge; rest coated pieces on rack 10 minutes.
5. Fry in batches until golden and 165°F inside (6–8 minutes for tenders, 12–15 minutes for thighs/drums), managing oil at 320–350°F.
6. Drain on rack, sprinkle with salt, and rest 5 minutes; finish in a 375°F oven 8–10 minutes if pieces need more time.
What to Serve It With
– Dill pickles and a drizzle of hot honey (trust me)
– Coleslaw or a crunchy cabbage salad
– Cornbread or gluten-free biscuits with honey butter
– Potato salad, fries, or smashed salt-and-vinegar potatoes
– Lemon wedges and a quick ranch or spicy mayo
Tips & Mistakes
– Let the coated chicken rest before frying. It hydrates the flour and prevents bald spots.
– Don’t crowd the pot. Crowding = soggy crust and sad oil temps.
– Keep an eye on temperature. Too hot burns the crust before the inside cooks; too cool soaks up oil.
– Season in layers. Marinade, dredge, and post-fry sprinkle. That’s the flavor stack.
– Use a rack, not paper towels, for draining. Airflow keeps the crunch.
– Gluten cross-contact is real. Use fresh oil and clean tongs/thermometer if someone is celiac.
Storage Tips
Pop leftovers in a lidded container with a paper towel in the bottom and stash in the fridge up to 3–4 days. Reheat in a 400°F oven for 10–12 minutes or air fryer at 360°F for 6–8 minutes until loud and crispy again. Or eat it cold standing at the fridge at 11 p.m.—no shame, it’s excellent that way. Breakfast fried chicken? Elite.
Variations and Substitutions
– Nashville-ish hot: Toss hot-out-of-oil chicken in warm chili oil + paprika + brown sugar. No brown sugar? Use honey or maple.
– Dairy-free: Swap buttermilk for plant milk + lemon or pickle juice. Add 1 tsp tamari for savory depth (soy sauce if you’re not GF, but keep it tamari if you are).
– Oven-baked: Brush with oil, bake on a rack at 425°F for 30–40 minutes (tenders 15–20), flipping once. Not as shatter-crisp but still very good.
– Air fryer: Mist dredged chicken with oil; cook at 375°F for 12–16 minutes, flipping halfway. Don’t skip the oil mist or it’ll taste floury.
– Spice swap: Cajun seasoning, lemon pepper, or smoky chipotle all slap. Just watch the salt levels.
– No rice flour: Use a 1:1 gluten-free all-purpose blend and bump cornstarch to 3/4 cup for extra crunch.
Write me the frequently asked questions and answers Delish Gluten Free Fried Chicken Recipes in the same way as the example below.
Frequently Asked Questions
Delish Gluten Free Fried Chicken Recipes
Ingredients
Main Ingredients
- 3 lb bone-in chicken thighs and drumsticks Pat very dry for best crunch
- 2 cups buttermilk
- 2 count large eggs Lightly beaten
- 2 tsp hot sauce Ensure gluten-free brand
- 1.5 cups gluten-free all-purpose flour Use a 1:1 blend with xanthan gum if possible
- 0.5 cup cornstarch Check gluten-free labeling
- 1 tsp baking powder Gluten-free
- 2 tsp fine sea salt
- 1.5 tsp black pepper
- 2 tsp garlic powder
- 2 tsp onion powder
- 2 tsp smoked paprika
- 0.5 tsp cayenne pepper Adjust to taste
- 2 qt peanut or canola oil, for frying Enough to reach 1.5 inches depth in pot
- 2 tbsp fresh parsley, chopped Optional garnish
Instructions
Preparation Steps
- Whisk buttermilk, eggs, and hot sauce in a large bowl. Season with 1.0 tsp salt and 0.5 tsp black pepper. Add chicken, turn to coat, and marinate while you prepare the coating or up to 12 hours chilled.
- In a separate large bowl, mix gluten-free flour, cornstarch, baking powder, remaining 1.0 tsp salt, remaining black pepper, garlic powder, onion powder, smoked paprika, and cayenne.
- Remove chicken from the buttermilk, letting excess drip off. Dredge each piece in the flour mixture, pressing firmly so a thick, even coating adheres. Place coated pieces on a wire rack and let rest 10 minutes.
- Heat 1.5 inches of oil in a deep, heavy pot to 350 F. Maintain the temperature between 325 F and 350 F throughout frying.
- Fry chicken in batches without crowding. Thighs typically take 12 to 15 minutes and drumsticks 10 to 12 minutes, turning occasionally, until deeply golden and the thickest part reaches 165 F.
- Transfer to a clean wire rack set over a sheet pan to drain. Lightly season with a pinch of salt while hot and let rest 5 minutes to set the crust.
- Garnish with chopped parsley and serve hot with your favorite sides.
- Make-ahead tip: Cool leftovers completely, refrigerate up to 2 days, and re-crisp in a 400 F oven for 10 to 12 minutes.
Notes
Featured Comments
“Super easy and turned out amazing! My family asked for seconds. Saving this one.”
“This energizing recipe was turned out amazing — the crunchy really stands out. Thanks!”
“Super easy and so flavorful! My family asked for seconds. Saving this one.”
“New favorite here — absolutely loved. nutty was spot on.”
“Super easy and will make again! My family asked for seconds. Saving this one.”
“This warm recipe was will make again — the comforting really stands out. Thanks!”
“Made this last night and it was will make again. Loved how the satisfying came together.”
“New favorite here — so flavorful. family favorite was spot on.”
“Super easy and absolutely loved! My family asked for seconds. Saving this one.”
“This morning favorite recipe was family favorite — the guilt-free really stands out. Thanks!”

