Delish Peanut Butter Cup Cookies
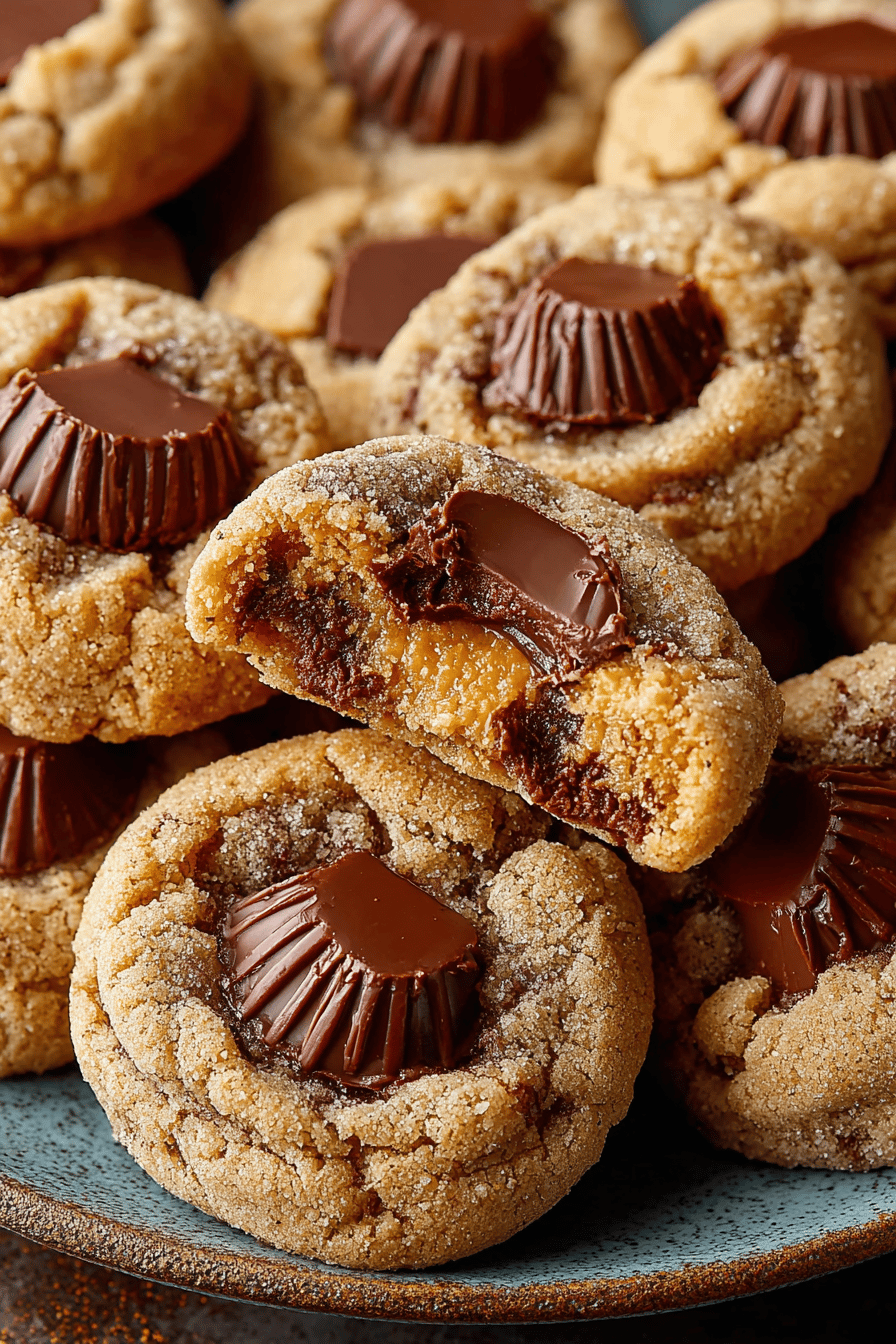
These are the soft, salty-sweet, peanut-buttery cookies I make when people I love are coming over in like… 45 minutes and I also want to look like I tried. It’s a peanut butter cookie baked in a mini muffin tin, then you press a little peanut butter cup into the warm center so it gets glossy and melty and ridiculous. Edges go lightly chewy, center is like a bite-size lava situation. Absolutely not fancy, absolutely perfect.
My husband calls these “the dangerous ones” because he’ll sneak two while they’re cooling and then somehow the tray is half gone and the neighbor “stopped by.” The kids help by unwrapping the candy—which is code for eating every third one and getting chocolate fingerprints on their faces like tiny raccoons. This recipe is one of those default, dependable, cozy things we make for bake sales, game nights, and Tuesdays we want to feel like Fridays.
Why You’ll Love This Delish Peanut Butter Cup Cookies
– Bite-size but bold—soft peanut butter cookie outside, melty candy middle. No crumbs wasted.
– Pantry staples. If you’ve got butter, PB, sugar, and an egg, you’re already halfway there.
– No chilling drama. Dough’s ready as soon as the oven is.
– They freeze like a dream. Future-you will thank past-you.
– Crowd hypnotizers. Put them down, turn around, gone.
– Kid helper friendly: unwrapping candy = occupational hazard and also half the fun.
How to Make It
Preheat your oven to 350°F and grab a mini muffin pan. Spray it like you mean it (or use little paper liners if you’re a planner). Unwrap a bunch of mini peanut butter cups now so you’re not panic-unwrapping with oven mitts on later.
MORE OF OUR FAVORITE…
Cream softened butter, creamy peanut butter, brown sugar, and granulated sugar till fluffy—like 2 minutes, quick joy. Beat in an egg and vanilla. In a separate bowl, whisk flour, baking soda, and a tiny pinch of salt. Stir the dry stuff into the wet just until it looks like cookie dough and you’re tempted to “quality control” taste it. If it’s sticky, a 10–15 minute chill in the fridge helps.
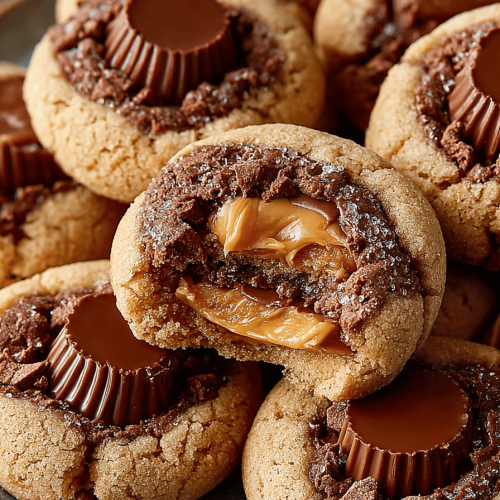
Scoop a heaping tablespoon of dough, roll it into a ball, toss in sugar if you’re feeling sparkly, and pop each ball into the mini muffin cups. Bake 8–10 minutes—edges set, tops puffed, still soft in the middle. Pull the pan, immediately press a mini peanut butter cup into the center of each cookie. It’ll melt in just enough to glue in place and get shiny. Let them sit in the pan 10 minutes so the chocolate can re-firm, then twist them out with a butter knife and try not to burn your mouth. I fail at that last part often.
Ingredient Notes
– Creamy Peanut Butter: Use the regular shelf-stable kind for best texture. Natural PB can work, but stir it super well and expect a slightly crumblier cookie.
– Unsalted Butter: Soft, not melty. If your finger leaves a gentle dent, you’re golden. Too melty = greasy cookies.
– Brown Sugar: Adds moisture and chew. I go light brown, but dark brown is great if you want deeper caramel vibes.
– Granulated Sugar: For structure and those sugared-outside sparkles. Rolling the dough balls in extra sugar = chef’s kiss.
– All-Purpose Flour: Measure it right—fluff, spoon, level. Packed flour means dry, sad cookies.
– Baking Soda: Gives lift and a little spread. Old baking soda is basically dust; check the date.
– Egg + Vanilla: The glue and the perfume. Don’t skip either. The vanilla makes it taste like a bakery.
– Mini Peanut Butter Cups: Unwrap ahead! Press them in while cookies are hot so they nestle and shine. Dark or milk both work.
– Flaky Salt (optional): A pinch on top before the chocolate sets = fancy without trying.
Recipe Steps
1. Preheat oven to 350°F; grease a mini muffin pan (24-count) or line with papers.
2. Unwrap 36 mini peanut butter cups and set aside.
3. Cream 1/2 cup unsalted butter, 1/2 cup creamy peanut butter, 1/2 cup brown sugar, and 1/2 cup granulated sugar until fluffy.
4. Beat in 1 large egg and 1 teaspoon vanilla.
5. Whisk 1 1/2 cups flour, 1 teaspoon baking soda, and 1/4 teaspoon salt; mix into wet just until combined.
6. Roll 1-tablespoon balls in sugar, place in pan, bake 8–10 minutes; press a peanut butter cup into each, cool 10 minutes, then remove to a rack.
What to Serve It With
– A cold glass of milk or a dunk-happy oat latte.
– Vanilla ice cream with two warm cookies like a tiny sundae situation.
– Salty snacks (pretzels, popcorn) for that sweet-salty loop you can’t escape.
– Coffee after dinner, because yes, we’re living a little.
Tips & Mistakes
– Overbaking is the fun-killer. Pull them when they still look a touch soft.
– Unwrap the cups first. Ask a small human to help if you dare.
– If the dough feels sticky, chill 10–15 minutes—no need for a full nap.
– Press the cups in right away so they settle; wait too long and they’ll just sit on top like hats.
– Let them cool in the pan before removing or they might collapse. Patience, deep breaths.
– If they won’t pop out, run a butter knife around the edge and twist gently.
Storage Tips
Room temp: Airtight container up to 4 days. They somehow get softer on day two—in a good way.
Fridge: Makes them chewy and the chocolate snappy. I weirdly love one cold for breakfast. Zero regrets.
Freezer: Layer with parchment in a zip bag or container up to 3 months. Thaw on the counter 20 minutes or microwave 7–10 seconds for gooey centers.
Variations and Substitutions
– Dark chocolate PB cups: Richer, slightly less sweet. A win.
– Crunchy PB: Adds little peanut bits—fun texture, still holds together.
– Almond butter + almond butter cups: Works, but almond butter can be looser; add 1–2 tablespoons extra flour if the dough feels soft.
– Gluten-free: A 1:1 GF baking blend usually works fine. Don’t skip the rest time in the pan; they’re more delicate.
– Dairy-free: Use plant butter sticks and a dairy-free PB cup brand. Still delish.
– Maple or honey: Swap up to 1/3 of the granulated sugar; add 1–2 tablespoons extra flour to balance the moisture.
– No mini muffin pan? Bake as regular cookies: flatten sugar-rolled balls on a sheet, bake 8–9 minutes, then gently press the PB cup on top. They’ll be a little flatter but still A+.
Frequently Asked Questions
Delish Peanut Butter Cup Cookies
Ingredients
Main Ingredients
- 1.5 cup all-purpose flour
- 1 teaspoon baking soda
- 0.5 teaspoon fine salt
- 0.5 cup unsalted butter, softened 1 stick
- 0.5 cup creamy peanut butter
- 0.5 cup granulated sugar
- 0.5 cup light brown sugar, packed
- 1 large egg
- 1 teaspoon vanilla extract
- 1 tablespoon milk optional, for a softer cookie
- 36 pieces mini peanut butter cups, unwrapped Reese’s Miniatures
- 0.25 cup granulated sugar for rolling
Instructions
Preparation Steps
- Preheat oven to 350°F. Lightly grease a 24-cup mini muffin pan or line with mini paper liners.
- In a bowl, whisk together flour, baking soda, and salt; set aside.
- In a large bowl, beat butter, peanut butter, granulated sugar, and brown sugar until light and fluffy, about 2 minutes.
- Beat in egg, vanilla, and milk until smooth.
- Add dry ingredients to the wet mixture and mix on low just until combined; do not overmix.
- Scoop dough into 1 tablespoon portions, roll into balls, then roll each ball in the extra granulated sugar.
- Place dough balls into the mini muffin cups. Bake until puffed and lightly golden, 8 to 10 minutes; centers will still look soft.
- Immediately press one mini peanut butter cup into the center of each cookie. Let sit in the pan for 5 minutes to set.
- Carefully loosen edges and transfer cookies to a wire rack to cool completely.
- Store in an airtight container at room temperature up to 5 days or freeze up to 2 months.
Notes
Featured Comments
“Impressed! Clear steps and turned out amazing results. Perfect for busy nights.”
“Impressed! Clear steps and turned out amazing results. Perfect for busy nights.”
“New favorite here — so flavorful. creamy was spot on.”
“Made this last night and it was family favorite. Loved how the rich came together.”
“Made this last night and it was family favorite. Loved how the sweet treat came together.”
“Super easy and so flavorful! My family asked for seconds. Saving this one.”
“This creamy recipe was absolutely loved — the sweet treat really stands out. Thanks!”
“New favorite here — family favorite. rich was spot on.”
“Super easy and family favorite! My family asked for seconds. Saving this one.”
“Super easy and will make again! My family asked for seconds. Saving this one.”