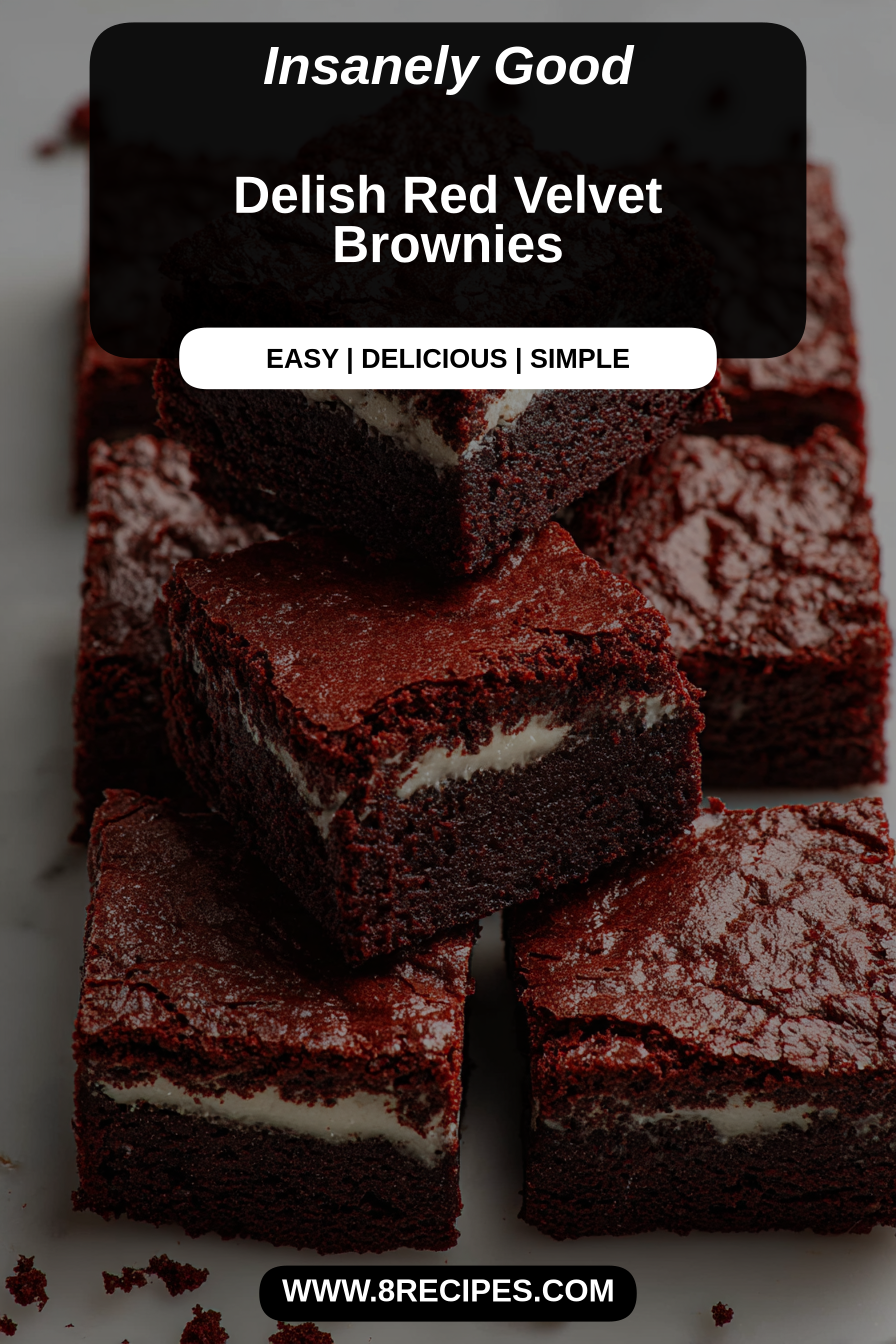
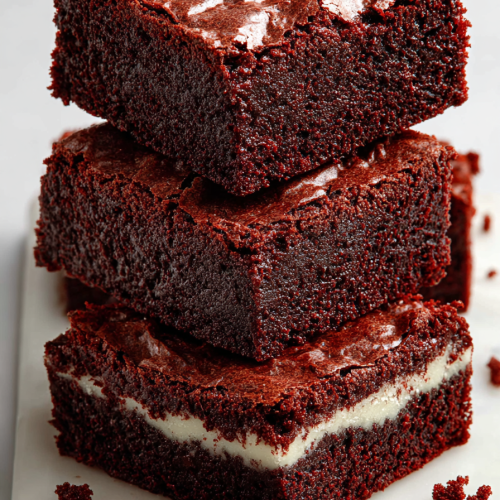
Delish Red Velvet Brownies

I made these Delish Red Velvet Brownies because I have a weakness for anything that combines drama (red color), comfort (brownies), and the ability to pretend it’s fancy when people come over. They’re fudgy, a little cakey where it counts, and come with that cream-cheese swirl that makes you feel both indulgent and morally superior to boxed mixes. Try them because chocolate + tangy cream cheese is the kind of decision that never regrets you.
My husband “helped” by taste-testing the batter with the dignity of a raccoon. The kids used the empty cream cheese tub as a microphone and declared themselves judges of texture, flavor, and my life choices. I took one photo, turned to wipe a spill, and came back to find half the pan mysteriously reduced. Either my husband discovered teleportation or brownies possess stealth. Spoiler: it was husband.
Why You’ll Love This Delish Red Velvet Brownies
– They look like you spent hours crafting dessert art, but they’re basically a glorified dump-and-stir situation.
– The cream-cheese swirl punches through the chocolate like it owns the place. It does.
– Kid-approved, adult-praised, and social-media-friendly (filters optional).
– They behave like brownies in texture but show up to the party wearing red velvet—classy imposters.
Time-Saving Hacks
– Use boxed cake mix + cocoa powder when you’re hangry and not feeling noble. Don’t tell anyone I said that.
– Swap the hand mixer for a whisk if you have patience (you don’t). The whisk also doubles as a defense against curious toddlers.
– Line the pan with foil or parchment so you can pop the whole thing out like a dessert magician—less scrubbing, more applause.
– Make the cream-cheese swirl in the same bowl you used for the batter if you’re into living dangerously and owning fewer dishes.
– Bake in a slightly larger pan to shave a few minutes off baking time; edges = crispy, center = still perfect.
MORE OF OUR FAVORITE…
Serving Ideas
– Serve with a scoop of vanilla ice cream if you want to be dramatic and slightly sticky-faced.
– Drizzle with leftover cream cheese frosting and pretend you intended to be so extra.
– Pair with coffee in the morning and also pair with wine if the kids have been especially successful at tantruming that day.
– Break into squares and hide one in a secret snack drawer. Don’t look at me when your co-parent finds it.
– Keep it simple: warm a square, sit, and eat it like it’s therapy.
What to Serve It With
– Vanilla ice cream, whipped cream, or a slow clap.
– Black coffee or a milkshake, depending on your maturity level and available nap time.
– Fresh berries if you’re trying to fool someone into thinking it’s healthy.
Tips & Mistakes
Do not overbake: these are happiest when fudgy, not soul-sucked and dry.
Pan matters: Yes, this pan is too small. No, I won’t wash fewer dishes. If your batter comes right to the top, use a bigger pan or accept thinner brownies.
Swirl technique: dollop cream cheese and drag a knife through in gentle S shapes—overdoing it makes a marbled mess instead of art.
Salt: don’t skip a pinch. It’s tiny and dramatically improves everything.
If the kitchen catches an odd smell, it’s probably just my optimism burning.
Storage Tips
Store it in the fridge… if there’s any left. Cold midnight leftovers? Sometimes better than fresh.
– Keep in an airtight container for up to 5 days.
– Freeze slices between parchment for up to 2 months; thaw on the counter for 30–60 minutes for best results.
Variations and Substitutions
Swap whatever you want—sugar ↔ honey, soy sauce ↔ tamari, or skip steps and call it “deconstructed.” It still counts.
– Add white chocolate chips or chopped pecans for texture.
– Use beet juice for extra natural red if you’re feeling artisanal.
– Gluten-free flour blends work fine—treat them like brownies, not brownies pretending to be cake.
Delish Red Velvet Brownies
Ingredients
Main Ingredients
- 1 cup unsalted butter
- 1.5 cups granulated sugar
- 3 large eggs
- 1 cup all-purpose flour
- 0.5 cup unsweetened cocoa powder sifted
- 0.5 cup red food coloring
- 1 teaspoon vanilla extract
- 0.5 teaspoon salt
Instructions
Preparation Steps
- Preheat your oven to 350°F (175°C) and grease a 9x13 inch baking pan.
- Melt the butter in a large saucepan over low heat. Remove from heat and stir in the sugar, eggs, and vanilla.
- In a separate bowl, combine the flour, cocoa powder, and salt. Gradually add to the butter mixture until combined.
- Stir in the red food coloring until well mixed.
- Pour the batter into the prepared pan and smooth the top. Bake for 30 minutes.
- Let the brownies cool before cutting into squares and serving.
Notes
Featured Comments
“This creamy recipe was will make again — the rich really stands out. Thanks!”
“This sweet treat recipe was absolutely loved — the rich really stands out. Thanks!”
“New favorite here — so flavorful. crowd-pleaser was spot on.”
“This rich recipe was will make again — the crowd-pleaser really stands out. Thanks!”
“Made this last night and it was absolutely loved. Loved how the sweet treat came together.”
“Impressed! Clear steps and so flavorful results. Perfect for busy nights.”
“Made this last night and it was family favorite. Loved how the creamy came together.”
“This creamy recipe was so flavorful — the sweet treat really stands out. Thanks!”
“New favorite here — family favorite. crowd-pleaser was spot on.”
“This sweet treat recipe was family favorite — the rich really stands out. Thanks!”